MaxiPUNCH series — in detail.
MaxiPUNCH 102 Projector
Compact RGBW addressable projector for facade accent and architectural detail lighting. four interchangeable optic angles from 15° spot to 90° wide, configurable Intelligent White or full-color RGBW mode. Engineered for permanent outdoor installation.
Four interchangeable optic angles
15° spot, 25° medium, 40° flood, 90° wide — specifiable per fitting for the same beam family across a facade project.
MaxiLINK ready
Ships with native MaxiLINK compatibility — DMX512 full addressable control on a single two-core cable. No separate signal bus, no decoder downstream.
IP68 sealed for permanent install
IP68 sealed head engineered for permanent outdoor installation. IK07 impact protection for the install environment.
RGBW · Intelligent White
Full-color RGBW addressable output or Intelligent White (IW) mode with 250 lm output. Same fitting, two selectable behaviours by control layer.
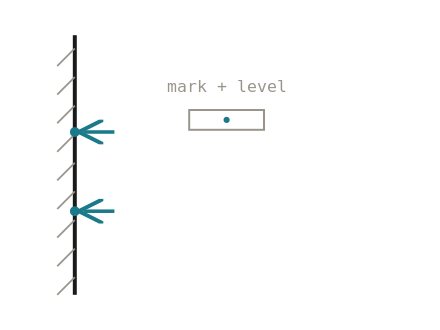
- 01Mark & check the surface. Verify the mounting surface is solid (sound masonry, not crumbling brick or loose timber). Mark the two fixing points and, if needed, the cable-exit point. Use a level so the bracket sits true. Start at the strand end where power enters.
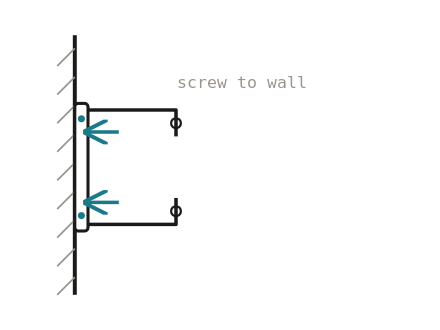
- 02Fix the bracket directly. The adjustable wall bracket (AWB) fixes directly to the surface through its base plate — drill, insert anchors suited to the material and drive the two screws evenly. Re-check level before final tightening.
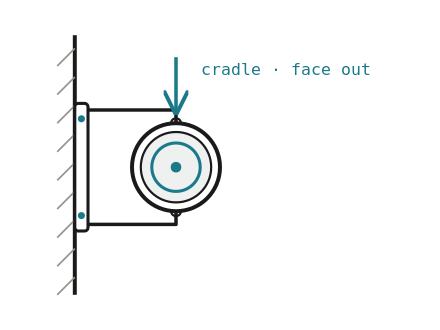
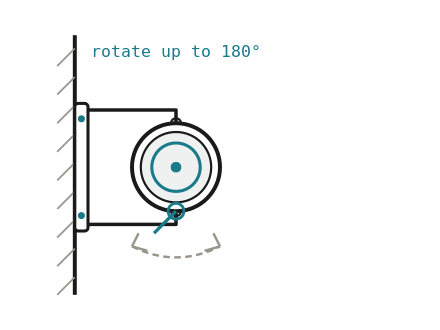
- 03Cradle the spotlight in the arms. Seat the MaxiPUNCH between the two bracket arms so the pivots engage the arm holes. The lens faces out from the wall.
- 04Rotate & lock (up to 180°). The spotlight rotates up to 180° on the pivots. Loosen the pivot knobs with the supplied hex key, aim the beam, then re-tighten to lock. Do not touch the factory-sealed screws (IP68).
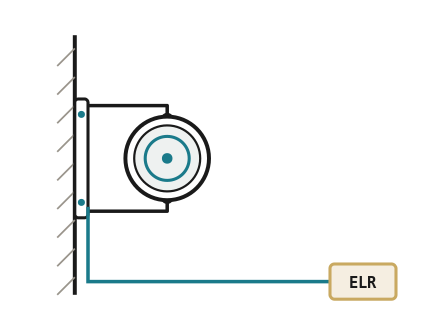
- 05Connect & terminate. Route the 2-core MaxiLINK cable (48 VDC + DMX 512), connect input/output with sealed connectors. Fit the ELR (End-of-Line Resistor) on the last fixture of the strand. Power up and check DMX.
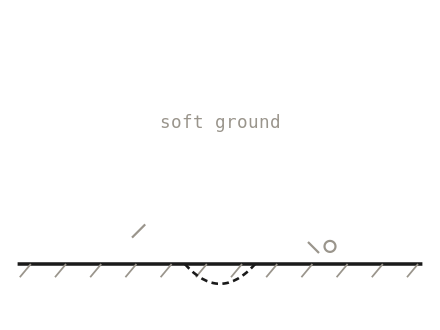
- 01Prepare the ground. Choose soft ground (soil, gravel, grass). If the soil is hard, moisten or loosen it with a spade and clear stones and debris. For precise placement you can pre-dig a small hole.
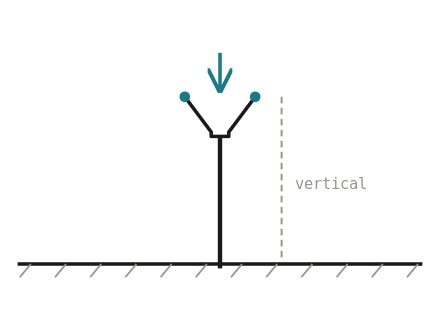
- 02Drive the spike in — vertical. Push the adjustable spike (AS) fully into the ground, keeping it vertical (use a level). In loose soil, firm the earth around the base — small stones help stability.
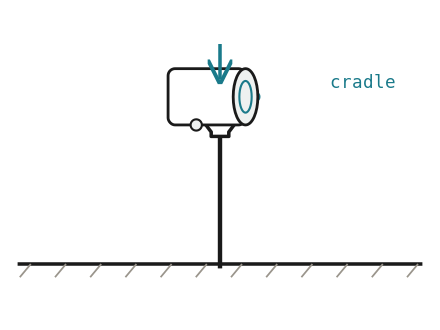
- 03Cradle the spotlight in the Y-fork. Seat the MaxiPUNCH into the spike's Y-fork so the side pivots rest in the fork. Engage the pivot bolts.
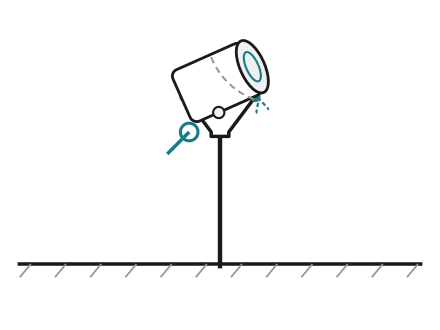
- 04Aim & lock the angle. Loosen the side pivot knobs with the supplied hex key, aim the beam (tree, shrub, architectural detail), then re-tighten to lock. Do not touch the factory-sealed screws.
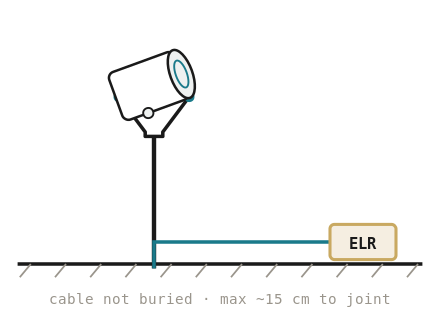
- 05Cable & terminate. Run the 2-core MaxiLINK cable beside the spike or along a structure; do not bury the cable except the short run needed to reach the joint (max ~15 cm) using IP-sealed connectors. Fit the ELR on the last fixture, power up and check.
MaxiPUNCH 302 Projector
Higher-output RGBW addressable projector, three times the lumen output of the 102 (450 lm Clear / 750 lm Intelligent White) with the same four optic angles. Designed for large-scale facade illumination and elevated-mount installations.
3× optical output of the 102
Higher-density LED engine delivers 450 lm Clear / 750 lm Intelligent White — the right pick for larger facades and monument installations where the 102 falls short on reach.
Same four optic angles as the 102
15° / 25° / 40° / 90° interchangeable optics — specify one common beam family across both projector sizes in a single project.
MaxiLINK ready
Same two-core cable carries 48 VDC plus full DMX512 control. Mixes with MaxiPUNCH 102 on the same data bus.
IP68 sealed for permanent install
IP68 sealed head engineered for permanent outdoor installation. IK07 impact protection for the install environment.
- 01Mark & check the surface. Verify the mounting surface is solid (sound masonry, not crumbling brick or loose timber). Mark the two fixing points and, if needed, the cable-exit point. Because the 302 body is heavier (~1 kg), verify pull-out load against local building code. Use a level so the bracket sits true.
- 02Fix the bracket directly. The adjustable wall bracket (AWB) fixes directly to the surface through its base plate — drill, insert anchors suited to the material and drive the two screws evenly. Re-check level before final tightening.
- 03Cradle the spotlight in the arms. Seat the MaxiPUNCH 302 between the two bracket arms so the pivots engage the arm holes. The lens faces out from the wall.
- 04Rotate & lock (up to 180°). The spotlight rotates up to 180° on the pivots. Loosen the pivot knobs with the supplied hex key, aim the beam, then re-tighten to lock. Do not touch the factory-sealed screws (IP68).
- 05Connect & terminate. Route the 2-core MaxiLINK cable (48 VDC + DMX 512), connect input/output with sealed connectors. Fit the ELR (End-of-Line Resistor) on the last fixture of the strand. Power up and check DMX.
- 01Prepare the ground. Choose soft ground (soil, gravel, grass). If the soil is hard, moisten or loosen it with a spade and clear stones and debris. For precise placement you can pre-dig a small hole.
- 02Drive the spike in — vertical. Push the adjustable spike (AS) fully into the ground, keeping it vertical (use a level). In loose soil, firm the earth around the base — small stones help stability.
- 03Cradle the spotlight in the Y-fork. Seat the MaxiPUNCH into the spike's Y-fork so the side pivots rest in the fork. Engage the pivot bolts.
- 04Aim & lock the angle. Loosen the side pivot knobs with the supplied hex key, aim the beam (tree, shrub, architectural detail), then re-tighten to lock. Do not touch the factory-sealed screws.
- 05Cable & terminate. Run the 2-core MaxiLINK cable beside the spike or along a structure; do not bury the cable except the short run needed to reach the joint (max ~15 cm) using IP-sealed connectors. Fit the ELR on the last fixture, power up and check.